Origami instructions of all models
| The origami instructions shown here are for all models in this site, origami-make.org. |
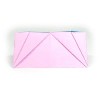
Origami Airplane
|
|
| Level |
Beginner |
| Copyright |
Hyo Ahn |
|
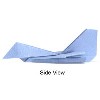
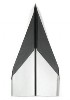
This simple origami jet plane requires only sixteen steps to follow |
| |
|
|

|
| Level |
Beginner |
| Copyright |
Hyo Ahn |
|
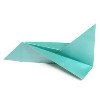
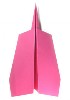
This easy origami jet plane is one of the oldest model I made in sixties. |
| |
|
|
|
|
|
| Level |
Beginner |
| Copyright |
Hyo Ahn |
|
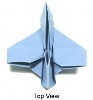
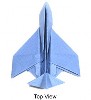
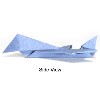
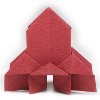
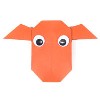
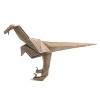
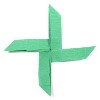
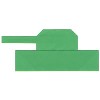
This simple origami airplane simulates a fighter jet plane. Two special folding techniques that you need to learn are inside reverse-fold and outside reverse-fold.
|
| |
|
|
|
|
|
| Level |
Intermediate |
| Copyright |
Hyo Ahn |
|
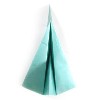
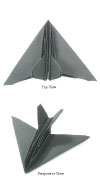
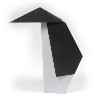
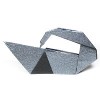
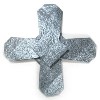
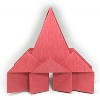
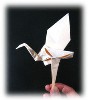
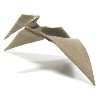
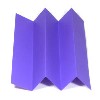
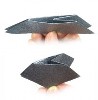
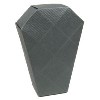
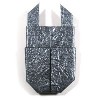
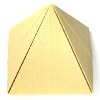
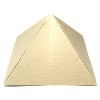
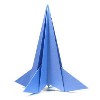
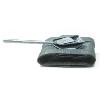
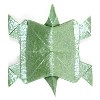
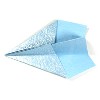
This origami model simulates a stealth aircraft. It starts from a balloon base. One special folding technique that you need to learn is inside reverse-fold. |
| |
|
|

|
| Level |
Beginner |
| Copyright |
Hyo Ahn |
|
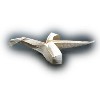
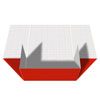
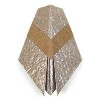
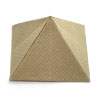
This simple origami space shuttle is a beginner's version of space shuttle. It is quite simple to fold. One special folding technique that you need to careful about is inside reverse-fold. |
| |
|
|
|
|
|
| Level |
Intermediate |
| Copyright |
Hyo Ahn |
|
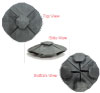
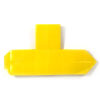
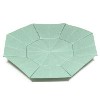
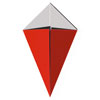
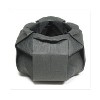
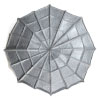
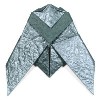
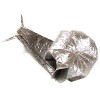
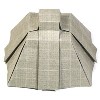
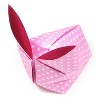
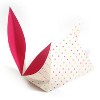
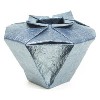
This origami UFO model simulates a landed UFO. It is not that difficult to fold. One special folding technique that you need to learn is rabbit ear-fold. |
| |
|
|
|
|
| Level |
Intermediate |
| Copyright |
Hyo Ahn |
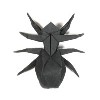
|
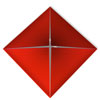
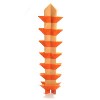
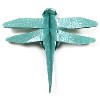
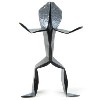
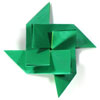
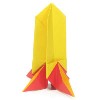
This origami UFO model simulates a flying UFO with four anti-gravity generators. If you are in novice in origami, it might be very difficult for you to fold. In that case, you need to tackle an easier model first and become comfortable with many folding techniques. Some of special folding techniques involved with this model are Z-fold, inside reverse-fold, and square-fold. |
| |
|
|
Origami Animals
|
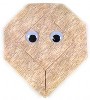 |
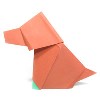
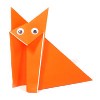
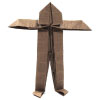
This easy origami lion takes 21 steps to complete. There is no special folding technique involved in this model.
|
| |
|
|
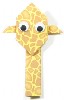 |
This easy origami giraffe was made by using a giraffe-pattern origami paper.
|
| |
|
|
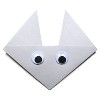 |
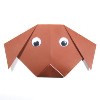
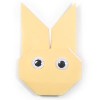
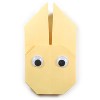
This easy origami mouse is the easiest origami mouse you can fold. |
| |
|
|
|
|
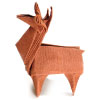
| Level |
Intermediate |
| Copyright |
Hyo Ahn |
|
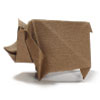
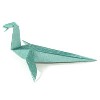
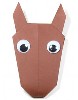
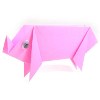
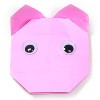
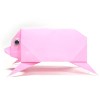
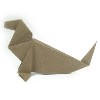
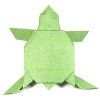
This standing origami rhino starts from a balloon base. Two special folding techniques that you need to learn from this model are squah-fold and petal-fold.
|
| |
|
|
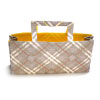
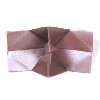
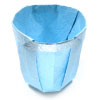
Origami Bag
|

|
| Level |
Beginner |
| Copyright |
Traditional |
|
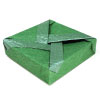
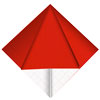
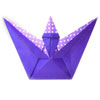
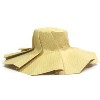
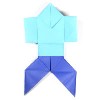
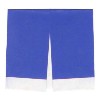
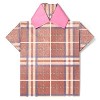
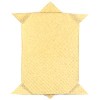
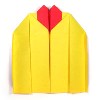
Initially this traditional origami tote bag follows the same folding sequence of the traditional origami cap. |
| |
|
|
|
|
| Level |
Beginner |
| Copyright |
Traditional |
|
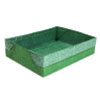
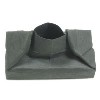
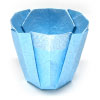
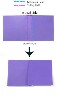
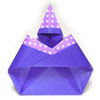
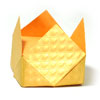
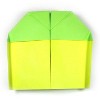
This traditional origami bag starts from a square base. There is no special folding technique involved with this model. |
| |
|
|
|
|
| Level |
Intermediate |
| Copyright |
Hyo Ahn |
|
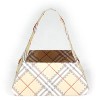
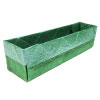
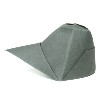
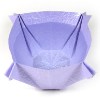
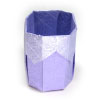
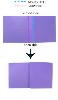
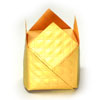
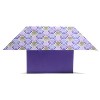
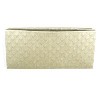
This 3D origami bag doesn't start from any special base. One special folding technique involved with this model is a rabbit ear-fold.
|
| |
|
|
|
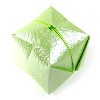
Origami Ball
|
 |
| Level |
Beginner |
| Copyright |
Traditional |
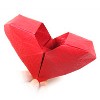
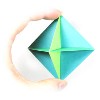
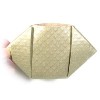
This traditional origami ball is easy to make and then you can play with it after you make one. It is based on balloon base. |
| |
|
|
|
 |
| Level |
Beginner |
| Copyright |
Hyo Ahn |
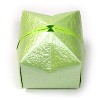
In my opinion, this origami ball is easier to make compare to the traditional origami ball. |
| |
|
|
|
|
|
 |
| Level |
Intermediate |
| Copyright |
Hyo Ahn |
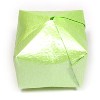
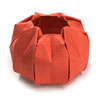
New origami ball is different from classic origami ball (or balloon). It is not based on balloon base and it is somewhat larger compare to the traditional origami ball. |
| |
|
|
Origami Base
|

|
|
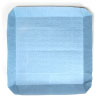
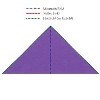
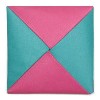
| Square base is a fundamental base. |
| |
|
|
 |
|
The relationship between square base and balloon base is like the one between valley-fold and mountain-fold. |
| |
|
| Bird Base |
|
|
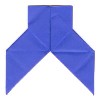
As the name implies, this base is for making an origami crane.
|
| |
|
|

|
|
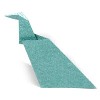
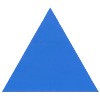
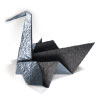
| Kite base is a simple base in origami but used in many important origmai models such as origami bird and swan. |
| |
|
|
 |
|
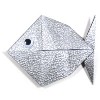
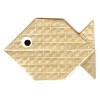
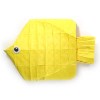
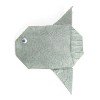
Initially you will be applying a kite base for two times and then applying two outside reverse-folds. This fish base is abundantly being used for makeing origami fish. |
| |
|
|
 |
|
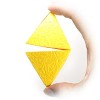
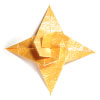
This fruit origami base is derived from the well-know square base. This base can also be derived from balloon base. |
| |
|
|
|
|
|
|
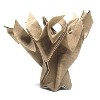
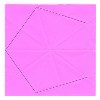
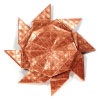
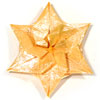
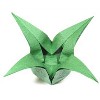
As the name says, this base is needed when you fold an origami lily with six petals. Real lily has six petals. So if you want to have a six petals lily, you need to start with a regular hexagon paper.
|
| |
|
|
|
|
|
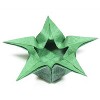
This base is needed when you fold a flower calyx. A various kinds of calyx can be maded from this base.
|
| |
|
|
|
|
This base is needed when you fold a flower calyx with five sepals.
|
| |
|
|
|
|
This base is needed when you fold a flower calyx with six sepals.
|
| |
|
|
|
 |
|
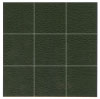
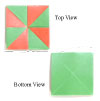
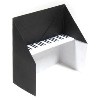
From this instructional pages, you will be able to make a origami base with 3x3 matrix cells. |
| |
|
|
|
 |
|
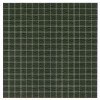
From this instructional pages, you will be able to make a origami base with 4x4 matrix cells. |
| |
|
|
|
 |
|
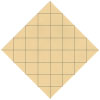
From this instructional pages, you will be able to produce a origami base with 6x6 matrix cells. |
| |
|
|
|
 |
|
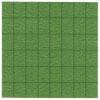
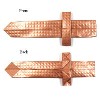
From this instructional pages, you will be able to produce a origami base with 8x8 matrix cells. |
| |
|
|
|
 |
|
From this instructional pages, you will be able to produce a origami base with 12x12 matrix cells. |
| |
|
|
|
 |
|
16x16 matrix origami base will let you make a origami base with 16x16 matrix cells. If you have already learned how to make a 8x8 matrix base, you can skip to the step #7, i.e., the page 5. |
| |
|
|
|
 |
|
From this instructional pages, you will be able to produce a origami base with masked 8x8 matrix cells. The name "masked" is given since it would be the exactly 8x8 matrix base without the masking of four corners. |
| |
|
|
 |
|
From this instructional pages, you will be able to produce a origami base with masked 16x16 matrix cells. The name "masked" is given since it would be the exactly 16x16 matrix base without the masking of four corners. |
| |
|
|
|
 |
|
This 6x8 matrix origami base will let you make a origami base with 6x8 matrix cells. |
| |
|
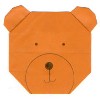
Origami Bear
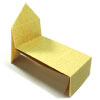
Origami Bed
|
|
| Level |
Intermediate |
| Copyright |
Hyo Ahn |
|
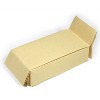
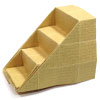
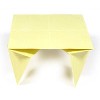
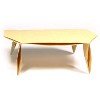
| This simple single origami bed requires you to apply Z-fold initially. You also need to apply chair-fold twice. Later, you will learn what 90 degrees valley- and mountain-folds are. |
| |
|
|
|
| Level |
Intermediate |
| Copyright |
Hyo Ahn |
|
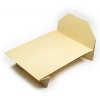
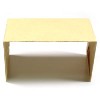
| You need to learn what Z-fold and modified chair-fold are in order to make this single origami bed II. |
| |
|
|
|
|
| Level |
Intermediate |
| Copyright |
Hyo Ahn |
|
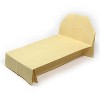
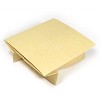
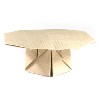
You will apply 90 degrees valley- and mountain-folds to make this double origami bed II. It is very similar to the double origami bed. |
| |
|
|
|
| Level |
Intermediate |
| Copyright |
Hyo Ahn |
|
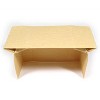
The double origami bed requires similar folding methods shown on the single origami bed.
|
| |
|
|
|
|
| Level |
Intermediate |
| Copyright |
Hyo Ahn |
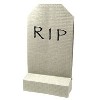
|
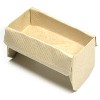
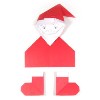
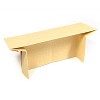
This origami cradle of Christmas may be suitable for an intermediate level folders since it requires 48 steps to complete. However, there is no special folding technique involved with this model. |
| |
|
|
|
Origami Bird
|
|
| Level |
Beginner |
| Copyright |
Traditional |
|
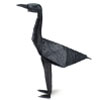
The base of origami bird is "kite base" which is used for making an origami swan. Also you will learn what "inside reverse-fold" from this origami bird.
|
| |
|
|

|
| Level |
Beginner |
| Copyright |
Traditional |
|
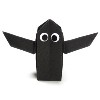
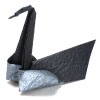
The origami crow starts from bird base. One special folding technique you need to know for this model is inside reverse-fold
|
| |
|
|
|

|
| Level |
Beginner |
| Copyright |
Traditional |
|
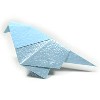
| The essential folding technique that you need to know before working on this traditional origami dove is inside reverse-fold. You will be applying four times of it. |
| |
|
|
|
| Level |
Beginner |
| Copyright |
Traditional |
|
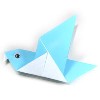
This traditional origami pigeon is a very simple model. Only special folding technique that you need to know is inside reverse-fold. |
| |
|
|
|
| Level |
Beginner |
| Copyright |
Traditional |
|
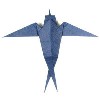
This traditional origami swallow starts from bird base. One special folding technique you need to know for this model is inside reverse-fold. |
| |
|
|
|
|

|
| Level |
Intermediate |
| Copyright |
Traditional |
|
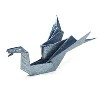
From this traditional origami phoenix, you will be able to learn both petal-fold and inside reverse-fold.
|
| |
|
|
|
| Level |
Beginner |
| Copyright |
Traditional |
|
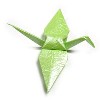
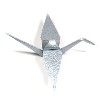
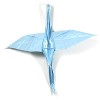
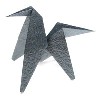
While you are making an origami crane, you will learn two bases: (1) square base and (2) bird base. For many people, origami crane might be the first model to learn origami folding. So it is like a prerequisite for more advance models. |
| |
|
|
|
|
| Level |
Intermediate |
| Copyright |
Hyo Ahn |
|
This origami crane is different from the traditional origami crane. It is based on calyx base instead of bird base. It is a bit skinnier than the traditional one.
|
| |
|
|

|
| Level |
Beginner |
| Copyright |
Traditional |
|
This traditional origami crane II also starts from bird base. The special feature of this model is an unique shape of two wings. |
| |
|
|
|
| Level |
Beginner |
| Copyright |
Traditional |
|
This simple origami penguin is very easy to fold. One distinctive feature of this model is that you can learn easily what the folding technique of outside reverse-fold is.
|
| |
|
|
|
| Level |
Beginner |
| Copyright |
Traditional |
|
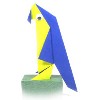
This traditional origami owl is based on so-called "bird base". One special folding technique you will learn from this model is an asymmetric inside reverse-fold. |
| |
|
|

|
| Level |
Beginner |
| Copyright |
Traditional |
|
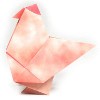
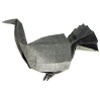
This traditional origami rooster is an easy model. There is no special folding technique involved with this model.
|
| |
|
|
|
| Level |
Beginner |
| Copyright |
Traditional |
|
This traditional origami chick is an easy model to make. One special folding technique involved with this model is inside reverse-fold. You will need to apply this technique for two times
|
| |
|
|
|
| Level |
Beginner |
| Copyright |
Traditional |
|
This traditional origami hen is an easy model. The special folding techniques involved with this model are squash-fold and inside reverse-fold.
|
| |
|
|
|
| Level |
Beginner |
| Copyright |
Traditional |
|
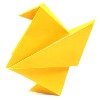
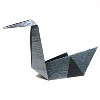
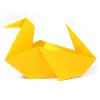
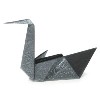
This is one of the simplest origami swan you can make out of a square paper. Ths origami swan is based on a so-called "kite base".
|
| |
|
|
With Mother Swan
|
| Level |
Beginner |
| Copyright |
Traditional / Hyo Ahn |
|
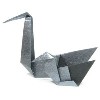
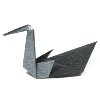
| This origami baby swan is even more easier to fold compared to the traditional origami swan. |
| |
|
|
|
|
| Level |
Beginner |
| Copyright |
Traditional |
|
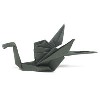
This origami peacock is a traditional model which makes use of an inside reverse-fold for three times
|
| |
|
|

|
| Level |
Intermediate |
| Copyright |
Hyo Ahn |
|
You can fold an origami peacock with spreading feathers with one sheet of square paper. You will need to apply both petal-fold and outside reverse-fold. |
| |
|
|
|
| Level |
Intermediate |
| Copyright |
Hyo Ahn |
|
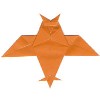
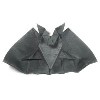
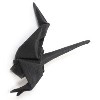
| You can fold this origami bat for the coming Halloween. One special folding technique that you need to know for this model is petal-fold.
|
| |
|
|
|
|
| Level |
Intermediate |
| Copyright |
Hyo Ahn |
|
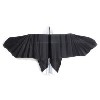
This origami eagle is for an intermediate-level folder. Two basic folding techniques that you need to apply for this model are both inside reverse-fold and outside reverse-fold.
|
| |
|
|
|
Origami Boat
|
|
 |
| Level |
Beginner |
| Copyright |
Traditional |
|
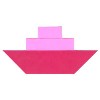
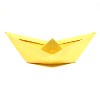
This traditional easy origami boat might be the simplest origami boat you will ever fold. In this instruction, there are six steps to complete this model. However, if you become an expert, you will only need two steps to make it. Those steps are one valley-fold and one outside reverse-fold. This is a good example to learn the folding technique of outside reverse-fold. If you want, you can try this boat on the water. It actually floats
|
| |
|
|
|
|
 |
| Level |
Beginner |
| Copyright |
Traditional |
|
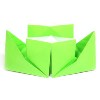
What you will learn from this magic boat is gate-fold and it is very similar to the traditional origami catamaran in the initial sequence of folding. The most interesting feature of this model is that you can perform a magic in front of your friend with this boat.
|
| |
|
|
|
 |
| Level |
Beginner |
| Copyright |
Traditional |
|
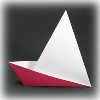
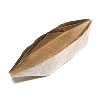
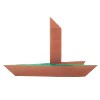
You will be starting with a square-base with this origami sailboat. It is very easy to follow. Once we complete making the traditional origami sailboat, you can stop there. However, an instruction to make a modified version of this sailboat will be given afterwards
|
| |
|
|
 |
| Level |
Beginner |
| Copyright |
Traditional |
|
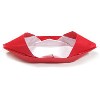
This traditional origami sailboat is one of easiest origami models you could make. You will learn a special folding technique to open a pocket.
|
| |
|
|
 |
| Level |
Beginner |
| Copyright |
Traditional |
|
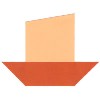
This traditional origami steamboat is very interesting model to work on. This is a good example to learn the folding technique called "squash-fold".
|
| |
|
|
 |
| Level |
Beginner |
| Copyright |
Traditional |
|
This traditional origami steamboat with double smokestacks is very close to the traditional origami chair. They share the same folding steps up to the step #10 by applying cushion-fold three times
|
| |
|
|
|
 |
| Level |
Beginner |
| Copyright |
Traditional |
|
The origami sampan boat showing here has an impressive folding technique called "locking fold". This technique alone can be an exciting learning experience. |
| |
|
|
 |
| Level |
Beginner |
| Copyright |
Traditional |
|
This traditional origami motorboat is similar to the traditional origami sampan boat. Two model share the same folding technique of opening a pocket. However, there is a difference. This origami motorboat has two nice decks. |
| |
|
|
|
 |
| Level |
Beginner |
| Copyright |
Traditional |
|
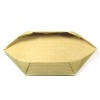
The most important technique that you should remember is the "pocket fold" which will be applied twice to make this boat. The most fascinating feature of this boat is that if you apply the "pocket fold" three times (that is, one more time) , then you can make a smaller size (about 2/3) boat with an identical shape of the original boat. |
| |
|
|
|
 |
| Level |
Beginner / Intermediate |
| Copyright |
Traditional |
|
This origami junk boat is a traditional model. It is advised to use a paper not easily tearable.
This means that a typical origami paper is not recommended.
|
| |
|
|
 |
| Level |
Beginner |
| Copyright |
Hyo Ahn |
|
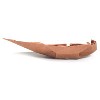
The special folding technique is being used for this origami boat is the inside reverse fold. Excep that, it is fairly easy to fold this long canoe. |
| |
|
|
|
 |
| Level |
Beginner |
| Copyright |
Hyo Ahn |
|
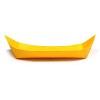
This origami reed boat is fairly easy to fold. The special folding techniques you will learn from this origami boat is the inside reverse fold and a curved mountain-fold.
|
| |
|
|
|
 |
| Level |
Beginner |
| Copyright |
Hyo Ahn |
|
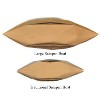
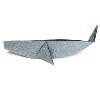
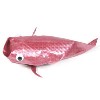
The large sampan boat is based on Fish Base and it is larger than the traditional sampan by about 40%.
|
| |
|
|
 |
| Level |
Beginner |
| Copyright |
Hyo Ahn |
|
Inflatable origami boat requires you to learn both gate-fold and inside reverse fold. Other than that, it is a simple boat to fold with. |
| |
|
|
|
| Level |
Beginner |
| Copyright |
Hyo Ahn |
|
The folding technique that you will learn from this origami catamaran boat is squash-fold. You will need to apply four squash-folds to this model. |
| |
|
|
|
| Level |
Beginner |
| Copyright |
Hyo Ahn |
|
This origami catamaran boat II is a little more complicated compared to a regular catamaran boat since the front side is slander than the back side. |
| |
|
|

|
| Level |
Beginner |
| Copyright |
Hyo Ahn |
|
This simple origami catamaran origami boat is different from the traditional one in folding sequence although the shape is very similar. One special folding technique you will need to know for this model is inside reverse-fold. |
| |
|
|
|
 |
| Level |
Beginner |
| Copyright |
Hyo Ahn |
|
This simple origami Noah's ark is a simple version of origami Noah's ark. There is no special folding technique involved with this model. |
| |
|
|
|
 |
| Level |
Beginner |
| Copyright |
Hyo Ahn |
|
| This origami magic boat starts from 8x8 matrix base. Its function is similar to the traditional magic boat. However, it is a bit skinnier compare to the traditional one.
|
| |
|
|
|
 |
| Level |
Beginner |
| Copyright |
Hyo Ahn |
|
This wide origami boat simulates a boat with a wide width. The special folding techniques that you will learn from this origami boat are inside reverse fold, squash-fold, and petal-fold. |
| |
|
|
|
|
| Level |
Intermediate |
| Copyright |
Hyo Ahn |
|
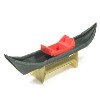
The origami Gondola boat is consist of (1) boat, (2) four chair, and (3) stand. The boat itself is derived from a long canoe. It will take 16 steps to make a boat stand while 31 steps for Gondola chair. Since you have to go through 21 steps for this instruction, the total steps for making three models will be 68. |
| |
|
|
|
|
| Level |
Beginner |
| Copyright |
Hyo Ahn |
|
You can use this origami boat stand for both origami boat and plastic model boat. You will be starting with Z-fold initially. One special folding technique you would learn from this model is inside reverse-fold. |
| |
|
|
|
|
| Level |
Beginner |
| Copyright |
Hyo Ahn |
|
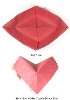
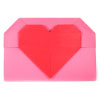
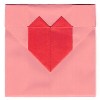
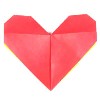
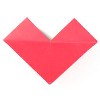
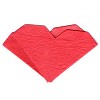
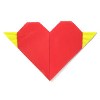
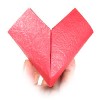
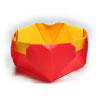
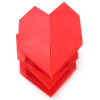
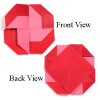
The upside-down side view of the origami heart boat resembles a heart shape. |
| |
|
|
|
 |
| Level |
Beginner |
| Copyright |
Hyo Ahn |
|
This new origami sampan boat is easier to fold compared to the traditional sampan boat. It is free from the special folding technique called "locking fold". I think it is a better looking interior of boat too. |
| |
|
|
|
 |
| Level |
Beginner |
| Copyright |
Hyo Ahn |
|
This origami house boat simulates a real house boat. One special folding technique you would learn from this model is outside reverse-fold. |
| |
|
|
 |
| Level |
Beginner |
| Copyright |
Hyo Ahn |
|
This easy origami submarine starts from 8x8 matrix base. One special folding technique that you will from this model is a modified inside reverse-fold. |
| |
|
|
|
Origami Book
|
|
| Level |
Beginner |
| Copyright |
Hyo Ahn |
|
This easy origami book is a four-page long book made from a typical origami paper. If the original size of the paper is 15cm x 15cm, then the size of page will be 3.75cm x 3.75cm
|
| |
|
|

|
| Level |
Beginner |
| Copyright |
Hyo Ahn |
|
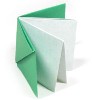
This origami album is a six-page long album made from a typical origami paper (15cm x 15cm). The size of each page of this album will be 2.5cm x 5cm. This means that If you want to put two 4" x 5" photos on each page, then the size of the paper should be at least 75cm x 75cm (or 30" x 30"). Initially origami album starts with both horizontal and vertical Z-folds
|
| |
|
|
Origami Bookmark
|
|
|
| Level |
Beginner |
| Copyright |
Hyo Ahn |
|
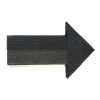
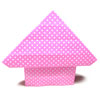
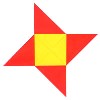
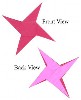
This is an origami arrow model. It starts with a 8x8 matrix base. You can use it as a bookmark.
|
| |
|
|
|
Origami Bowl
|
|
|
| Level |
Beginner |
| Copyright |
Hyo Ahn |
|
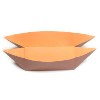
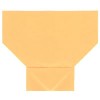
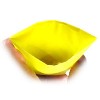
This origami bowl is 2D version. One special folding technique involved with this model is opening a pocket
|
| |
|
|
|
|
| Level |
Beginner |
| Copyright |
Hyo Ahn |
|
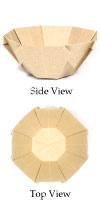
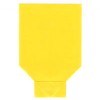
This simple origami bowl starts from 3x3 matrix base. One special folding technique that you need to learn for this model is reverse swivel-fold.
|
| |
|
|
|
|
| Level |
Intermediate |
| Copyright |
Hyo Ahn |
|
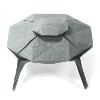
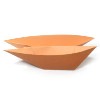
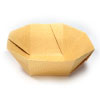
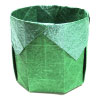
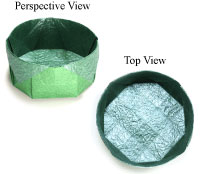
This origami bowl is 3D version of origami bowl. Initially it is derived from fruit base which I make use of a regular octagon shape.
|
| |
|
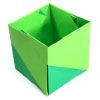
Origami Box
|
 |
| Level |
Beginner |
| Copyright |
Traditional |
|
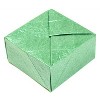
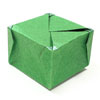
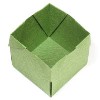
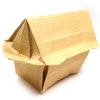
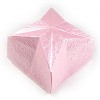
| This origami box is a traditional origami box and it is based on "cushion base". It is very easy to make this box and you can put anything into it. |
| |
|
|
 |
| Level |
Beginner |
| Copyright |
Traditional |
|
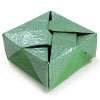
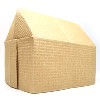
| This traditional oblong origami box is similar to easy origami house in the beginning stage of folding sequence. One special folding technique you need to apply is a squah-fold. |
| |
|
|
|
| Level |
Beginner |
| Copyright |
Hyo Ahn |
|
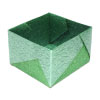
| This tall square origami box starts from a 4x4 matrix base. There is no special folding technique involved with this model. |
| |
|
|
|
| Level |
Beginner |
| Copyright |
Hyo Ahn |
|
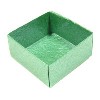
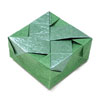
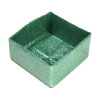
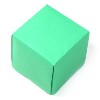
| The large square origami box is easy to fold. The height of this box is exactly half of square width. So it is flatter than a cubic box. A maximum volume for a square box can be made when square width is 2/3 where the volume is 2/27 = 0.074. Since the square width for this box is 1/2 and the volume is 0.0625, it generates a reasonable volume size. |
| |
|
|
|
 |
| Level |
Beginner |
| Copyright |
Hyo Ahn |
|
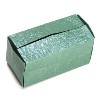
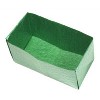
| This closed rectangular box starts from a 4 x 4 matrix box. The ratio among width, height, and length of the rectangle is 1:1:2 . One special folding technique involved with this model is inserting a flap into a pocket. |
| |
|
|
|
 |
| Level |
Beginner |
| Copyright |
Hyo Ahn |
|
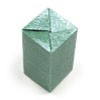
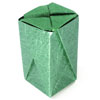
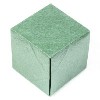
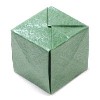
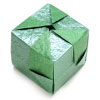
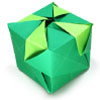
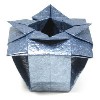
| This origami box is very unique. If you need a box with no opening, this is the one for you. |
| |
|
|
|
 |
| Level |
Beginner/ Intermediate |
| Copyright |
Hyo Ahn |
|
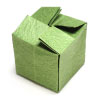
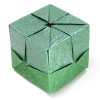
| This origami box is very unique. If you need a box with no opening, this is the one for you. |
| |
|
|
|
 |
| Level |
Beginner/ Intermediate |
| Copyright |
Hyo Ahn |
|
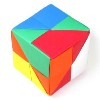
| This origami box starts from 4x4 matrix base. One special folding technique that you need to know for this model is rabbit ear-fold. |
| |
|
|
 |
| Level |
Beginner |
| Copyright |
Hyo Ahn |
|
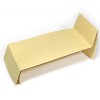
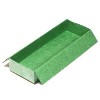
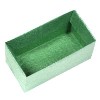
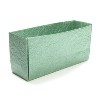
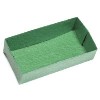
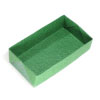
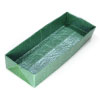
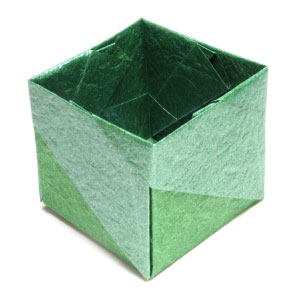
| You can fold a rectangular shaped open box here. The ratio between the width and the length of the rectangle is 1:2. This means that the area can be made out of two squares. |
| |
|
|
 |
| Level |
Beginner |
| Copyright |
Hyo Ahn |
|
| The rectangular shaped open box is presented here. The ratio between the width and the length of the rectangle is 1:2. One special folding technique involved with this model is 90 degrees mountain-fold. |
| |
|
|
 |
| Level |
Beginner |
| Copyright |
Hyo Ahn |
|
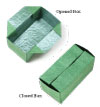
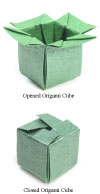
| This rectangular shaped origami box can be opened or closed. It starts with 8x8 matrix base. One special folding technique you could learn from this box is inside reverse-fold. |
| |
|
|
|
 |
| Level |
Beginner |
| Copyright |
Hyo Ahn |
|
| This flat square origami box is a open model. A special folding technique that you need to apply for this model is a petal-fold. You need to apply this petal-fold to inside of the box not outside. |
| |
|
|
|
 |
| Level |
Beginner |
| Copyright |
Hyo Ahn |
|
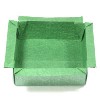
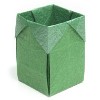
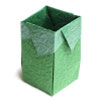
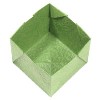
| This narrow deep origami box is a open box. There is no special folding technique involved with this model. |
| |
|
|
|
 |
| Level |
Beginner |
| Copyright |
Hyo Ahn |
|
| This trash origami box starts from a 8x8 matrix base. There is no special folding technique invloved with this model. |
| |
|
|
 |
| Level |
Beginner |
| Copyright |
Hyo Ahn |
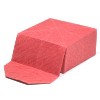
|
This flat rectangular shaped open box starts from 4x4 matrix base. The ratio among the width, the length, and the height of the rectangle is 4:6:1 . Two special folding techniques involved with this model are both 90 degrees mountain-fold and 90 degrees valley-fold.
|
| |
|
|
 |
| Level |
Beginner |
| Copyright |
Hyo Ahn |
|
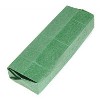
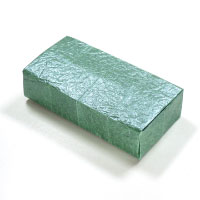
| You can fold a rectangular shaped thin closed box here. |
| |
|
|
 |
| Level |
Beginner |
| Copyright |
Hyo Ahn |
|
| The rectangular shaped open box is presented here. The ratio among the width, the length, and the height of the rectangle is 2:4:1 . One special folding technique involved with this model is 90 degrees mountain-fold. |
| |
|
|
 |
| Level |
Beginner |
| Copyright |
Hyo Ahn |
|
| This closed rectangular origami box starts from a 4x4 matrix box base. One special folding technique you need to learn from this model is a chair-fold. |
| |
|
|
 |
| Level |
Beginner |
| Copyright |
Hyo Ahn |
|
| This flat rectangular origami box II is very easy to fold. The ratio among the width, the length, and the height of the rectangle is 2:4:1 . One special folding technique involved with this model is Z-fold. |
| |
|
|
|
 |
| Level |
Beginner |
| Copyright |
Hyo Ahn |
|
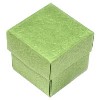
This origami box is a small sized square box. There is no special folding technique invloved with this model.
|
| |
|
|
|
| Level |
Beginner |
| Copyright |
Hyo Ahn |
|
| This medium square origami box doesn't make use of any base. One special folding technique that you need to learn for this model is 30 degrees valley-fold. |
| |
|
|
 |
| Level |
Beginner |
| Copyright |
Hyo Ahn |
|
| This closed oblong origami box starts from 8x8 matrix base. One special folding technique that you need to learn for this model is inserting a flap into another flap. |
| |
|
|
|
| Level |
Beginner |
| Copyright |
Hyo Ahn |
|
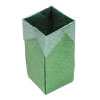
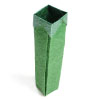
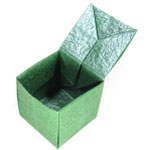
| This tallest square origami box starts from a 4x4 matrix base. One special folding technique you need to learn for this model is an inside reverse-fold. |
| |
|
|
|
 |
| Level |
Beginner |
| Copyright |
Hyo Ahn |
|
| This trash origami box II starts from a 2x2 matrix base. There is no special folding technique involved with this model. |
| |
|
|
 |
| Level |
Beginner |
| Copyright |
Hyo Ahn |
|
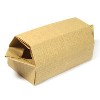
| This long rectangular origami box starts from a 8x8 matrix base. There is no special folding technique involved with this model. |
| |
|
|
 |
| Level |
Beginner |
| Copyright |
Hyo Ahn |
|
| This wide rectangular box starts from a masked 16x16 matrix box. The ratio among height, width, and length of the rectangle is 1:2:3 . One special folding technique involved with this model is inserting a flap into a pocket. |
| |
|
|
 |
| Level |
Beginner |
| Copyright |
Hyo Ahn |
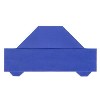
|
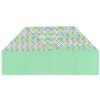
This wide and flat rectangular box starts from a 6x8 matrix base. It is fairly easy to make one. There is no special folding technique involved with this model.
|
| |
|
|
|
 |
| Level |
Beginner / Intermediate |
| Copyright |
Hyo Ahn |
|
| This origami box starts from 3x3 matrix base. Two special folding techniques that you need to learn for this models are both Z-fold and inside reverse-fold. |
| |
|
|
|
 |
| Level |
Beginner |
| Copyright |
Hyo Ahn |
|
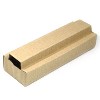
This origami box has a dimension ratio of length : width : height = 4 : 1 : 1. This 4x1x1 origami box starts from a 8x8 matrix base. You will learn to insert a flap into a pocket from this model.
|
| |
|
|
|
 |
| Level |
Beginner |
| Copyright |
Hyo Ahn |
|
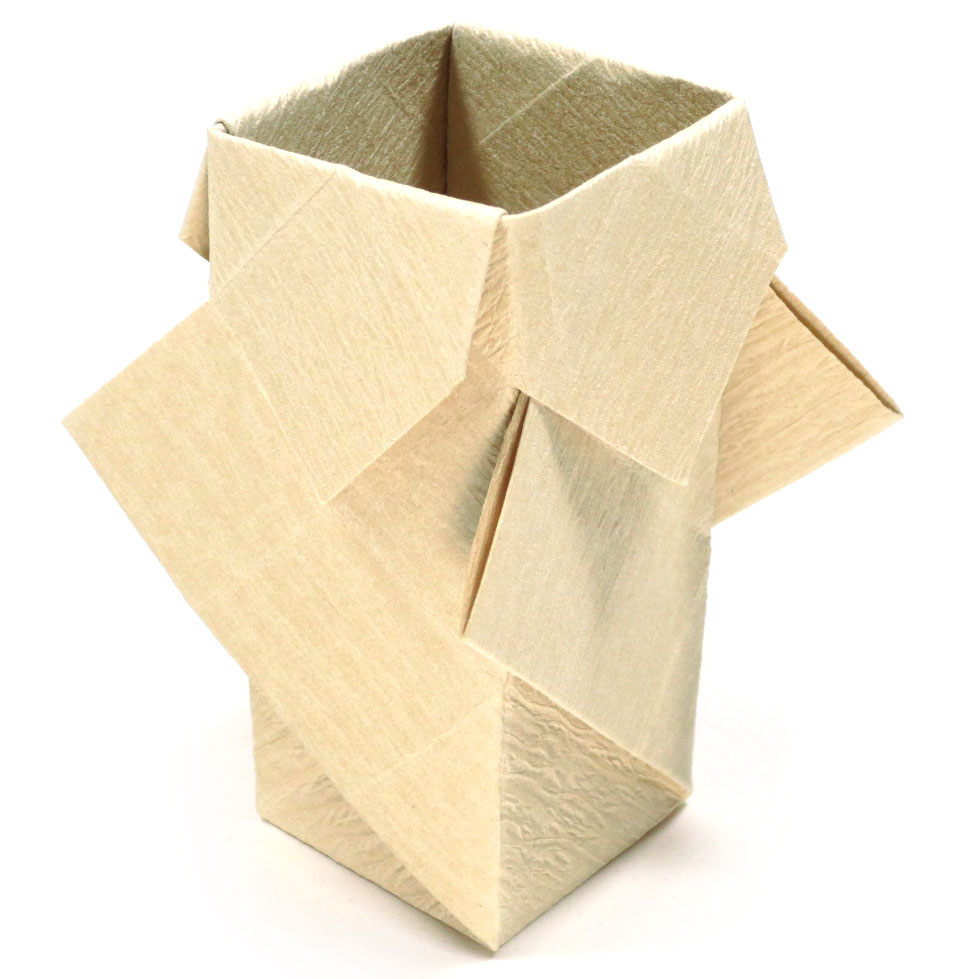
| This origami box is very unique. It is a tall origami box without an opening on the top. |
| |
|
|
|
 |
| Level |
Beginner |
| Copyright |
Hyo Ahn |
|
This closed tall origami box II starts from 8x8 matrix base. It is a closed box with a simple pattern on the sides. There is no special folding technique involved with this model.
|
| |
|
|
|
 |
| Level |
Beginner / Intermediate |
| Copyright |
Hyo Ahn |
|
This origami box starts from 8x8 matrix base. One special folding technique that you need to know for this model is pocket-fold.
|
| |
|
|
|
 |
| Level |
Beginner |
| Copyright |
Hyo Ahn |
|
| This square round origami box starts from 12x12 matrix base. This box looks the square shape when it is seen from the side. There is no special folding technique involved with this model. |
| |
|
|
|
 |
| Level |
Beginner |
| Copyright |
Hyo Ahn |
|
| This simple round origami box starts from 8x8 matrix base. It is very easy to make this round box. There is no special folding technique involved with this model. |
| |
|
|
|
 |
| Level |
Beginner/ Intermediate |
| Copyright |
Hyo Ahn |
|
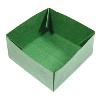
| This origami box starts from 4x4 matrix base. One special folding technique that you need to know for this model is squash-fold. |
| |
|
Origami Butterfly
|
|
|
| Level |
Beginner |
| Copyright |
Hyo Ahn |
|
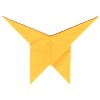
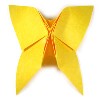
This easy origami butterfly takes only 8 steps to follow. The distinctive feature of this easy origami butterfly is that the back side is the same as the front one
|
| |
|
|
|
| Level |
Beginner |
| Copyright |
Traditional |
|
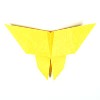
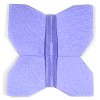
| The origami butterfly is based on so-called "twin-boat base". So you will learn what this twin-boat base is and how it is related to the butterfly. |
| |
|
|
|
| Level |
Beginner |
| Copyright |
Hyo Ahn |
|
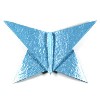
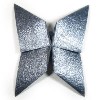
This simple origami butterfly is easy to make (13 steps). A special folding technique involved in this model is squash-fold
|
| |
|
|
|
| Level |
Intermediate |
| Copyright |
Hyo Ahn |
|
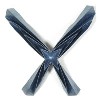
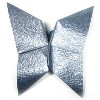
Initially the paper will be divided into 12 x 12 square cells and then a crease pattern will be applied.
|
| |
|
|
|
| Level |
Intermediate |
| Copyright |
Hyo Ahn |
|
This origami butterfly is derived from a balloon base. The essential folding technique being used for this model is inside reverse-fold.
|
| |
|
|
|
| Level |
Intermediate |
| Copyright |
Hyo Ahn |
|
This origami butterfly V is not derived from any base. It takes 33 steps to complete this model.
|
| |
|
|

|
| Level |
Intermediate |
| Copyright |
Hyo Ahn |
|
This origami butterfly VI starts from 8x8 matrix base. One special folding technique that you need to master for this model is separating the butterfly body from two wings by pulling them away.
|
| |
|
|
|
|
(open sink-fold) |
|
| Level |
Intermediate |
| Copyright |
Hyo Ahn |
|
This origami butterfly starts from a balloon base. The essential folding technique that you will learn from this model is open sink-fold. Also you will apply many times of inside reverse-fold.
|
| |
|
|
(closed sink-fold) |

|
| Level |
Intermediate |
| Copyright |
Hyo Ahn |
|
This origami butterfly starts from a balloon base. The essential folding technique that you will learn from this model is closed sink-fold. Do you see the difference from origami butterfly I where closed sink-fold replaced with open sink-fold?
|
| |
|
|
(open-closed sink-fold) |
|
| Level |
Intermediate |
| Copyright |
Hyo Ahn |
|
This origami butterfly starts from a balloon base. The essential folding technique that you will learn from this model is open-closed sink-fold. Also you will apply many times of inside reverse-fold.
|
| |
|
Origami Camera
|
|
| Level |
Beginner |
| Copyright |
Traditional |
|
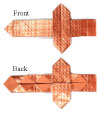
| This traditional origami camera is very similar to traditional origami pants. You will need to apply a cushion-fold for three times after turning the paper over for each cushion-fold. Unlike other origami models, this model doesn't try to simulate the shape of a camera. Instead it simulates the clicking sound of taking a picture.
|
| |
|
|
|
|
| Level |
Intermediate |
| Copyright |
Hyo Ahn |
|
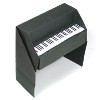
This digital origami camera is a 3D version of origami camera. One special folding technique involved with this model is a chair-fold
|
| |
|
|
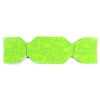
Origami Candy
|
|
| Level |
Beginner |
| Copyright |
Hyo Ahn |
|
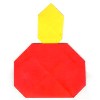
This easy origami candy is a 2D version of wrapped origami candy. |
| |
|
|
|
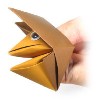
Origami Cap
| |
|
|
| Level |
Beginner |
| Copyright |
Traditional |
|
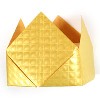
This traditional origami cap allows you to wear it if you prepare for a large square paper.
It might be an economical way to make this origami cap instead of buying a real one. |
| |
|
|
|
|
| Level |
Beginner |
| Copyright |
Hyo Ahn |
|
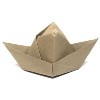
This square origami cap allows you to make a square shape origami cap.
There is no special folding technique involved with this model. |
| |
|
Origami Car
|
|
|
| Level |
Beginner |
| Copyright |
Hyo Ahn |
|
This easy origami car is a 2D version and it is very simple to fold. It takes 9 steps to complete.
|
| |
|
|
|
|
| Level |
Intermediate |
| Copyright |
Hyo Ahn |
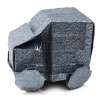
|
This 3D origami car is derived from 8x8 matrix origami base. It takes 37 steps to complete this model. This origami car is recommended to an intermediate level origamist.
|
| |
|
|
|
|
| Level |
Intermediate |
| Copyright |
Hyo Ahn |
|
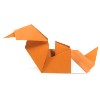
This 3D origami jeep is derived from 16x16 matrix origami base. It takes 43 steps to complete this model. This origami jeep is recommended to an intermediate level folder.
|
| |
|
|
|
|
| Level |
Beginner / Intermediate |
| Copyright |
Hyo Ahn |
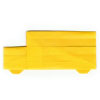
|
This origami school bus starts from 16x16 matrix base. It takes 27 steps to complete this model. You need to apply a simple crease pattern in the middle of folding sequence.
|
| |
|
|
|
|
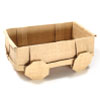
| Level |
Intermediate |
| Copyright |
Hyo Ahn |
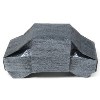
|
This 3D origami wagon starts from a 16x16 matrix base. One special folding technique that you need to apply for this model is swivel-fold.
|
| |
|
|
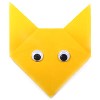
Origami Cat
|
|

|
| Level |
Beginner |
| Copyright |
Traditional |
|
This easy origami cat is probably the simplest origami cat you will ever find. |
| |
|
|
|
Origami Chair
|
|
| Level |
Beginner |
| Copyright |
Traditional |
|
| The origami chair is very similar to the fractal origami rose. Both models make use of three consecutive cushion folds. The only difference is (1) if you turn the model over between two consecutive cushion-folds, then you will end up with an origami chair, (2) if all cushion-folds are applied to the same side, then you will have a fractal origami rose. |
| |
|
|
|
| Level |
Beginner |
| Copyright |
Hyo Ahn |
|
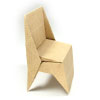
| The regular origami chair requies you to learn 90 degrees valley and mountain-folds. These folding techniques limit the valley and mountins-folding angles to be 90 degrees instead of the usual 180 degrees. |
| |
|
|
|
|
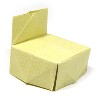
| Level |
Intermediate |
| Copyright |
Hyo Ahn |
|
| The regular origami chair requies you to learn 90 degrees valley and mountain-folds. These folding techniques limit the valley and mountins-folding angles to be 90 degrees instead of the usual 180 degrees. |
| |
|
|
|
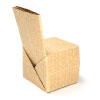
| Level |
Intermediate |
| Copyright |
Hyo Ahn |
|
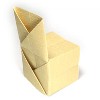
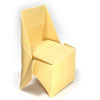
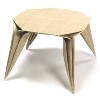
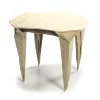
| You will learn three versions of trapezoid origami chair here. Three chairs will be shown in the order of difficulty. The name "Trapezoid" comes from the geometrical shape of the side. |
| |
|
|
|
| Level |
Beginner |
| Copyright |
Hyo Ahn |
|
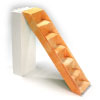
Initially you need to apply both horizontal and vertical Z-folds. Then a crease pattern is to be applied to make a large trapezoid origami chair.
|
| |
|
|
|
|
 |
| Level |
Beginner |
| Copyright |
Hyo Ahn |
|
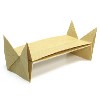
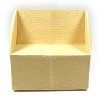
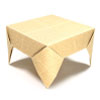
| You will apply both horizontal and vertical gate-folds initially. Then you need to apply a chair-fold. It will take 16 steps to complete this origami loveseat. |
|
|
|
|
| Level |
Intermediate |
| Copyright |
Hyo Ahn |
|
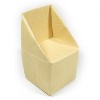
This Gondola origami chair simulates four chairs used on Gondola boat. A special folding technique that you need to learn from this model is a chair-fold (but you will use more advanced one).
|
| |
|
|
 |
| Level |
Beginner |
| Copyright |
Hyo Ahn |
|
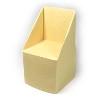
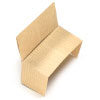
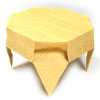
| Initially both horizontal and vertical gate-folds will be applied. Modified chair-fold will also be applied. It will take 23 steps to complete the trapezoid origami loveseat. |
|
|
|
|
| Level |
Beginner |
| Copyright |
Hyo Ahn |
|
This simple origami bench starts with 4x4 matrix base. One special folding technique you need to apply for this model is chair-fold.
|
| |
|
|
|
|
| Level |
Intermediate |
| Copyright |
Hyo Ahn |
|
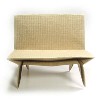
This origami bench requires two sheets of square paper. One special folding technique that you need to know for this model is Z-fold.
|
| |
|
|
|
|
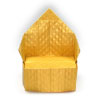
|
| Level |
Intermediate |
| Copyright |
Hyo Ahn |
|
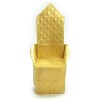
This origami throne is a simple model to make. Three special folding techniques that you need to learn for this model are inside reverse-fold, nail-fold, and modified chair-fold.
|
| |
|
|
|
|
| Level |
Intermediate |
| Copyright |
Hyo Ahn |
|
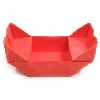
This wide origami throne starts from a 8x8 matrix base. There is no special folding technique involved wtih this model.
|
| |
|


 .
.