arrow_left

How to apply a valley-fold in origami

(page 1)

arrow_right


valley-fold in origami


This page is for those who want the instructions to learn how to apply a valley-fold.


Valley-fold is one of two important folding technique in origami. Equally important folding technique is Mountain-fold. If you know these two techniques, then you can fold almost all of simple origami models.


This is an animated instruction so it would be very easy to follow through. You are not required to have any prior knowledge about origami.


valley-fold in origami: front side of paper

00A.

When you are studying an origami diagram, you will be encountered with line symbols such as dashed line or dot-dashed line.


A simple dashed line represents a valley-fold while a dot-dashed line for a mountain-fold.


Here I use the red color for a valley-fold and the blue color for a mountain-fold just for a convenience.

valley-fold in origami: back side of paper

00B.

For an example, if a diagram shows a vertical dash line in the middle of the paper, it means you should valley-fold along the dash line.

valley-fold in origami

00C.

If you apply a valley-fold to the dash line, the paper will be transformed to form a "valley-shaped" or "V-shaped" figure.


The result is exactly opposite when you apply a mountain-fold which produces a "mountain-shaped" figure.


left arrow
left arrow


1


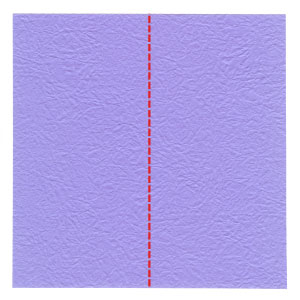
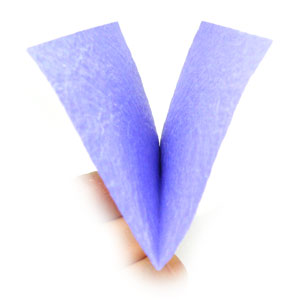
Let's share the photo of "valley-fold in origami" you made by submitting it below:


How To Apply A Valley-fold In Origami


© 2010-2024 origami-make.org All Rights Reserved